4 Wire Cooler Motor Wiring Diagram and Connection Procedure
Hey, in this article we are going to see the wiring diagram of Cooler Motor. Basically, the electric cooler uses a single-phase induction motor. First of all, we know that a motor is an electric machine that converts electrical energy into mechanical energy or rotational motion. So, in the electric cooler, the motor is used to drive the fan that will circulate air. Single-phase induction motor takes a 230V(India) or 120V(USA) AC supply and it works on the principle of electromagnetic induction. As we know the single-phase induction motor is not self-starting, so the cooler motor requires a capacitor. This capacitor will help to start the motor as well as to run with proper torque and speed.
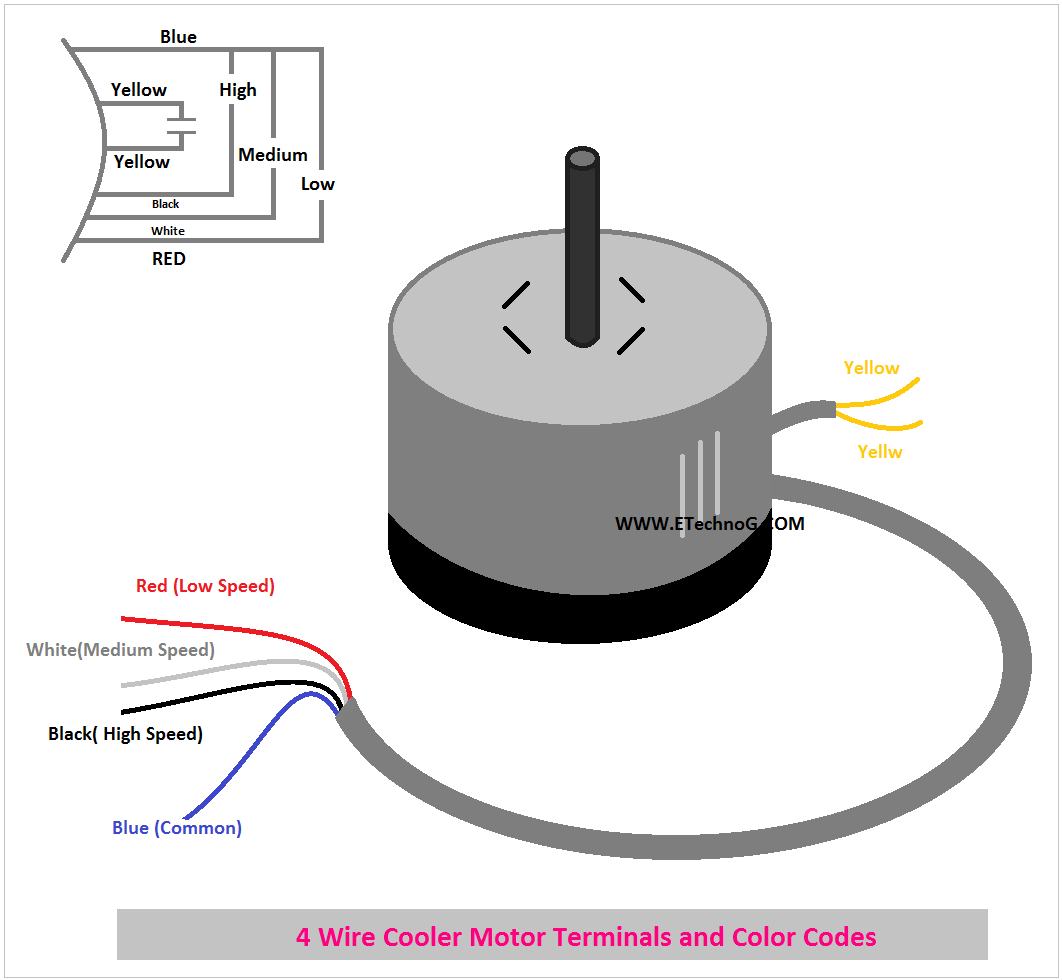
4 Wire Cooler Motor Terminals and Color Codes
The 4-wire cooler motor has four terminals for power supply and an additional two terminals to connect a capacitor. Here we have shown a motor and its terminal. But your motor may have different terminals and color-coding. So it is better to check the wiring diagram printed on the motor.
As you see in the above diagram the cooler motor has a total of six terminals,
- Blue Wire - It is the common wire that is to be connected to any one terminal of the power supply(best to connect with neutral)
- Black Wire - This terminal is for the highest or maximum speed.
- White Wire - This terminal is for medium speed.
- Red Wire - This terminal is for Low Speed.
- Yellow Wire - Here two yellow wires are there, and both of them are to be connected to the capacitor.
How to check terminals without color codes,
1. First of all take a multimeter and measure the resistance between all terminals with respect to each other and note it down.
2. The common terminal will have maximum resistance with respect to all other terminals.
3. High-speed terminal will have the lowest resistance with respect to the common terminal.
4. A Low-speed terminal will have the highest resistance with respect to the common terminal.
So, according to measured resistance, you can find out different terminals.
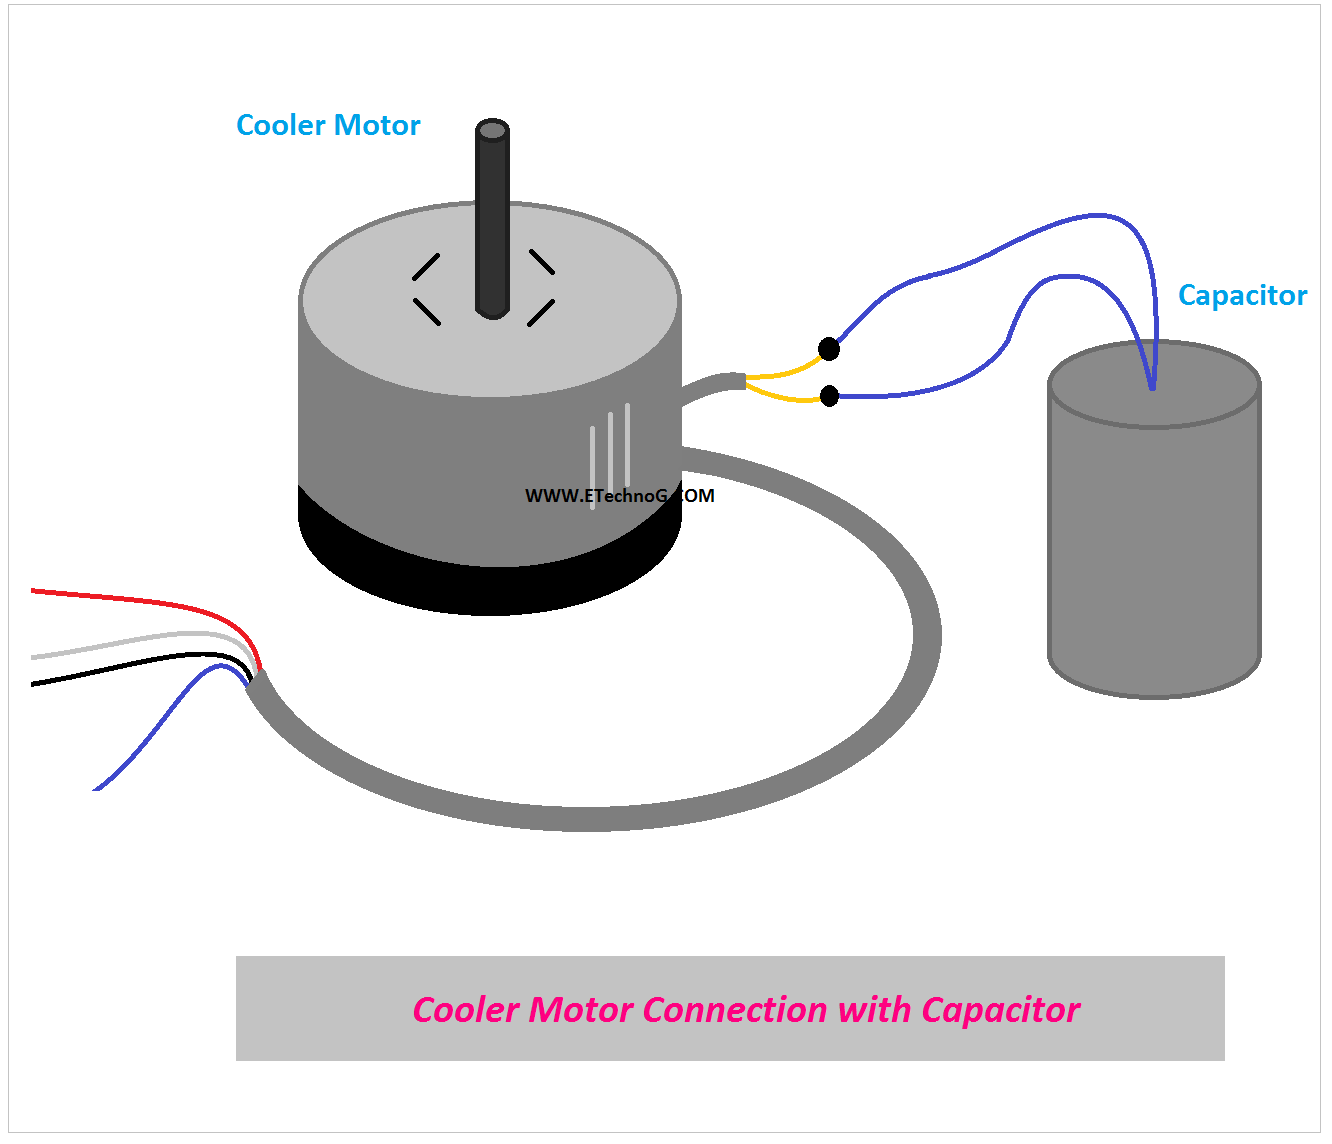
Cooler Motor Connection with Capacitor
Here, you can see the connection diagram of cooler motor with a capacitor. It is very simple. Just connect both of the yellow terminals to the capacitor terminals. As it is an AC capacitor, so there is no need to take care of the polarity.
4 Wire Cooler Motor Wiring Diagram
Here, you can see the complete wiring diagram of a 4 Wire Cooler Motor.
Connection Procedure
1. Connect both yellow terminals to the capacitor.
2. Connect the blue terminal with the neutral terminal of the power supply.
3. Connect the phase terminal of the power supply to the 'P' terminal of the regulator or 3-position switch.
4. Connect the black terminal to the '1' terminal of the switch.
5. Connect the white terminal to the '2' terminal of the switch.
6. Connect the Red terminal to the '3' terminal of the switch.
Some important knowledge for making the connection.
- There is no fixed polarity of the capacitor so you can connect in any polarity.
- The common wire must be connected to the neutral of the power supply, it should not be connected to the switch.
- Connect all the high, medium, and low-speed terminals to switch 1, 2, and 3 respectively. If you interchange any connection, it will not operate properly in a regular way.
Read Also:


