A Simple Digital Voltmeter Circuit Diagram
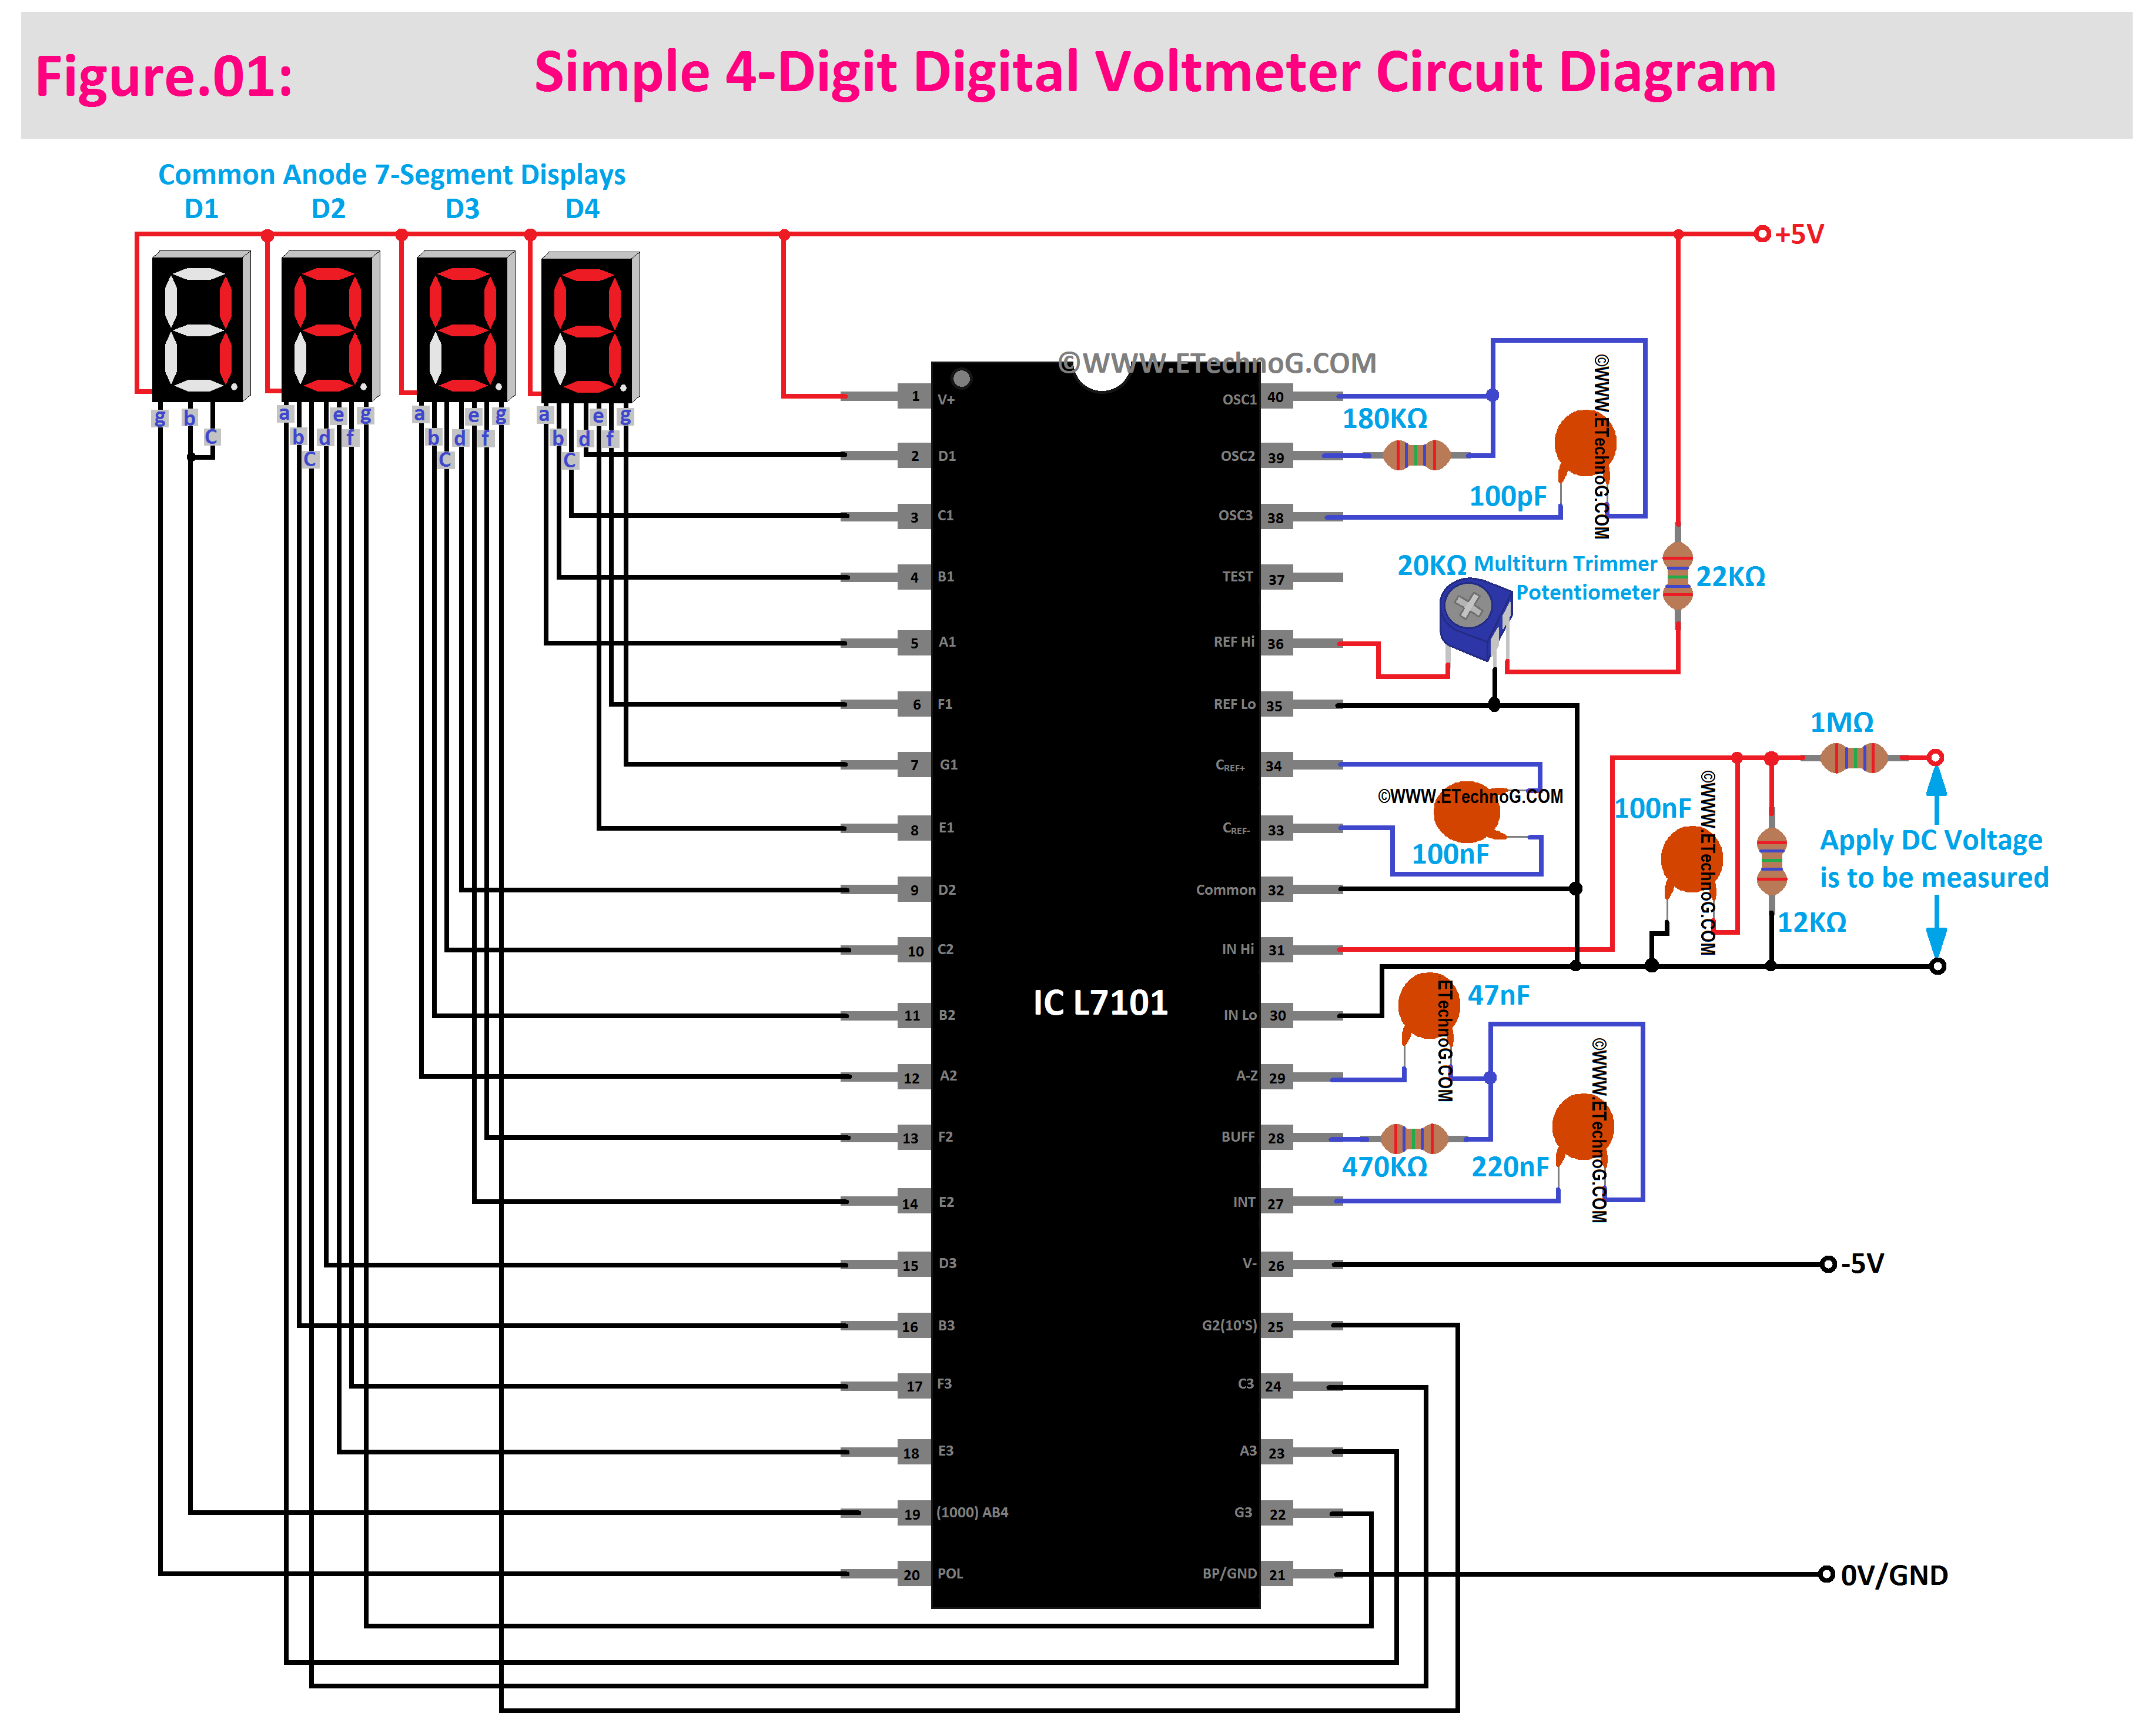
Here, in this article, we are going to see a very simple digital voltmeter circuit diagram. Here, we have built the circuit using ICL7107. The ICL7107 is a commonly used analog-to-digital converter (ADC) with a built-in 7-segment display driver, designed specifically for digital voltmeter applications. It can be used to create a simple digital voltmeter circuit that displays the voltage reading on a 3.5-digit 7-segment display.
Circuit Diagram
Here, you can see the circuit diagram of the Digital Voltmeter.
Component List
- ICL7107 - 1 PCs
- MAN 6960 Common Anode LED display - 1 PCs
- Resistor 180kΩ - 1 PCs
- Resistor 22kΩ - 1 PCs
- Resistor 12kΩ - 1 PCs
- Resistor 1MΩ - 1 PCs
- Resistor 470kΩ - 1 PCs
- Resistor 560Ω - 1 PCs
- 20kΩ Multiturn Trimmer Potentiometer - 1 PCs
- Capacitor 100pF - 1 PCs
- Capacitor 100nF - 1 PCs
- Capacitor 47nF - 1 PCs
- Capacitor 10nF - 1 PCs
- Capacitor 220nF - 1 PCs
- Capacitor 100nF - 2 PCs
- 5V DC Dual Power Source with +5V, 0V, and -5V
Function of Each Component
ICL7107: This is the heart of the circuit. It's an ADC that converts the analog input voltage into a digital value. It has an internal 7-segment LED display driver.
MAN 6960 Common Anode LED Displays: These are the 7-segment LED display with a common anode configuration. Each segment of the display can be lit individually to form numbers and other characters.
Resistors: The resistors are used to create voltage dividers in the input circuit, to make the oscillator circuit, etc. The values of some of these resistors affect the range and accuracy of the voltmeter.
Capacitors: The capacitors are used to make an RC Circuit, for filtering, and stabilizing purposes. They help smooth out any noise or fluctuations in the input voltage.
20kΩ Multiturn Trimmer Potentiometer: This potentiometer is mainly used for calibration purposes. It helps you adjust the circuit to display accurate voltage readings.
5V DC Dual Power Source: This provides the necessary power for the entire circuit.
How does the Circuit Work?
First of all, the voltage you want to measure is applied to the analog input pins(30, 31) of the ICL7107. This can be a voltage from a sensor, a battery, or any other voltage source you want to measure.
Then the input voltage is divided using resistors in the voltage divider configuration. The resistor 12kΩ determines the voltage range that the circuit can measure. The chosen resistors form the input scale and range. For example, now a 12kΩ resistor is connected so the circuit can measure voltage 0-200V. If we use a 1.2kΩ resistor instead of the 12kΩ resistor, the circuit will measure voltage 0-20V. Also, you can change the range of the voltmeter by replacing the 1MΩ series resistor also.
The ICL7107 converts the analog input voltage into a digital value using its internal analog-to-digital converter. It can handle negative voltages, zero, and positive voltages. The accuracy of the conversion depends on the quality of the components and the calibration of the circuit.
The ICL7107 also has an integrated LED display driver. It takes the digital output from the ADC and drives the segments of the 7-segment LED display (MAN 6960) to display the measured value in a human-readable format.
The 20kΩ multiturn trimmer potentiometer allows you to calibrate the circuit. By adjusting the potentiometer, you can set the circuit to accurately display the correct voltage corresponding to the input.
The combination of a 180kΩ resistor and 100pF capacitor is used to make an RC circuit to set oscillating frequency.
The capacitor 100nF connected in parallel across the voltage input pins helps to filter out any noise or fluctuations in the input voltage and stabilize the readings.
See Also:

