Working Principle of Static Relay with Block Diagram
Hey, in this article we are going to learn about Static Relays. A static Relay is where no mechanical moving part is available. A static relay is generally made with electronic components and circuitry. Here, in this article, we will see the block diagram of a static relay that will help you quickly understand its working principle. Here, two types of static relays are shown below. One is a simple conventional type built with general electronic circuitry and another one is built with a microprocessor. The microprocessor-based system gives more features such as indication, data visualization, and manual programming.
A Simple Static Relay Block Diagram
Here, you can see the block diagram of a simple static relay that is built with a rectifier circuit, comparator circuit, amplifier circuit, and output tripping circuit.
Working Principle
Static relay can be used for overvoltage or overcurrent fault protection. As the static relays are used with an ultra-high voltage system so a Current transformer(CT) and a Potential Transformer(PT) must be required. The current transformer will help to measure the flow of current and the potential transformer will help to measure voltage in a lower range. Basically, they step down voltage and current to a lower level so we can use a low-voltage measuring system.
Actually, the whole circuit works with a DC supply. So a rectifier circuit is used to convert the alternating current from the voltage and current sensors and provide it to the next part of the circuit.
Now the measuring or comparator circuit compares the voltage or current with a seated voltage or current. Once the signal is reached the threshold voltage the comparator will generate output and feed it to the amplifier. The amplifier circuit will amplify the signal received from the comparator and provide it to the output device. The output device will activate the tripping unit or tripping coil so the whole system will trip.
Read Also:
Microprocessor-Based Static Relay Block Diagram
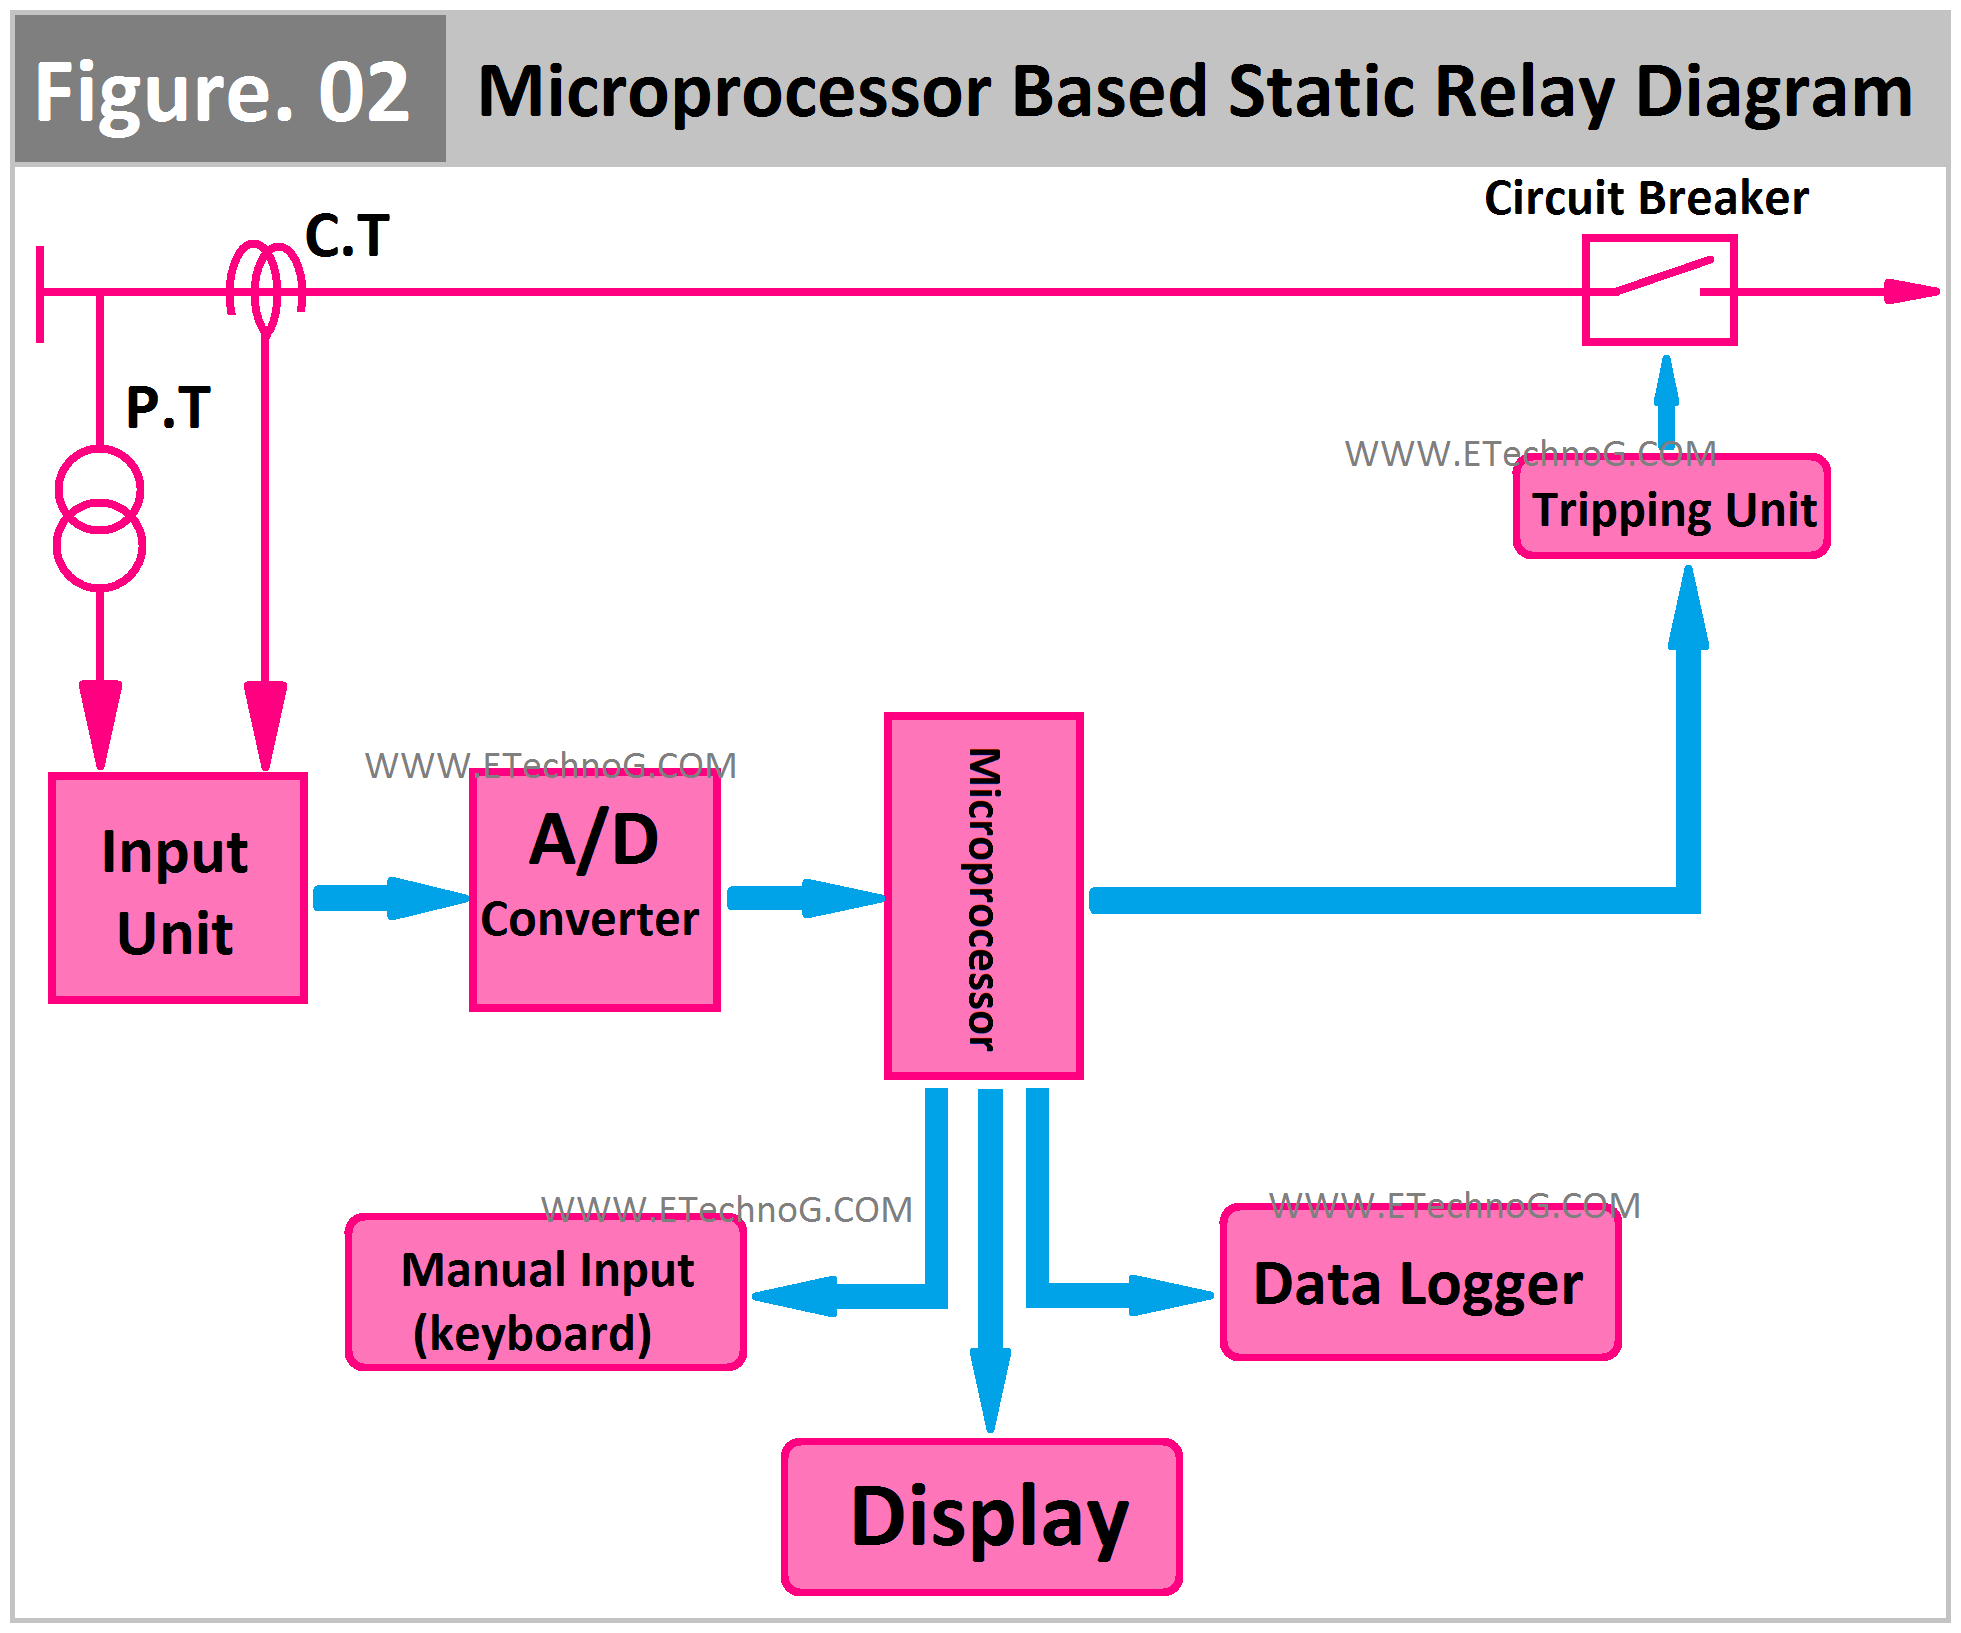
Here, you can see the block diagram of Microprocessor Based Static Relay. It is built with a microprocessor and some auxiliary input and output devices.
Working Principle
Here also, the current transformer and potential transformer can be used to sense the current and voltage. Other types of transducers also can be used that can generate the electrical signal. In the conventional static relay circuit, we have seen the analog electrical signal is directly applied to the processing unit or the comparator. But here is some difference.
We know that microprocessor works with digital signal only. It takes input in digital format and also provides output in digital format. So, you can see here an Analog to Digital Converter circuit is available at the input side of the microprocessor that will convert the analog signal coming from the input unit into a digital signal before sending it to the microprocessor.
Now the microprocessor will process the signal. Here, the microprocessor will show the data in the display and record it in the data logger. Also, we can give manual input or instructions to the microprocessor using the keyboard. The output of the microprocessor is connected to the output device or tripping unit. When there is an unhealthy condition in the circuit the microprocessor will operate the tripping unit to trip the circuit breaker. At the same time, it will trigger the alarm circuit and show the error in the display.
Digital to Analog Converter Circuit may be used at the output side of the Microprocessor. It converts the digital output signal from the microprocessor into an analog electrical signal that is will be provided to the output device if the device is designed to operate with an analog signal.
Read Also:


