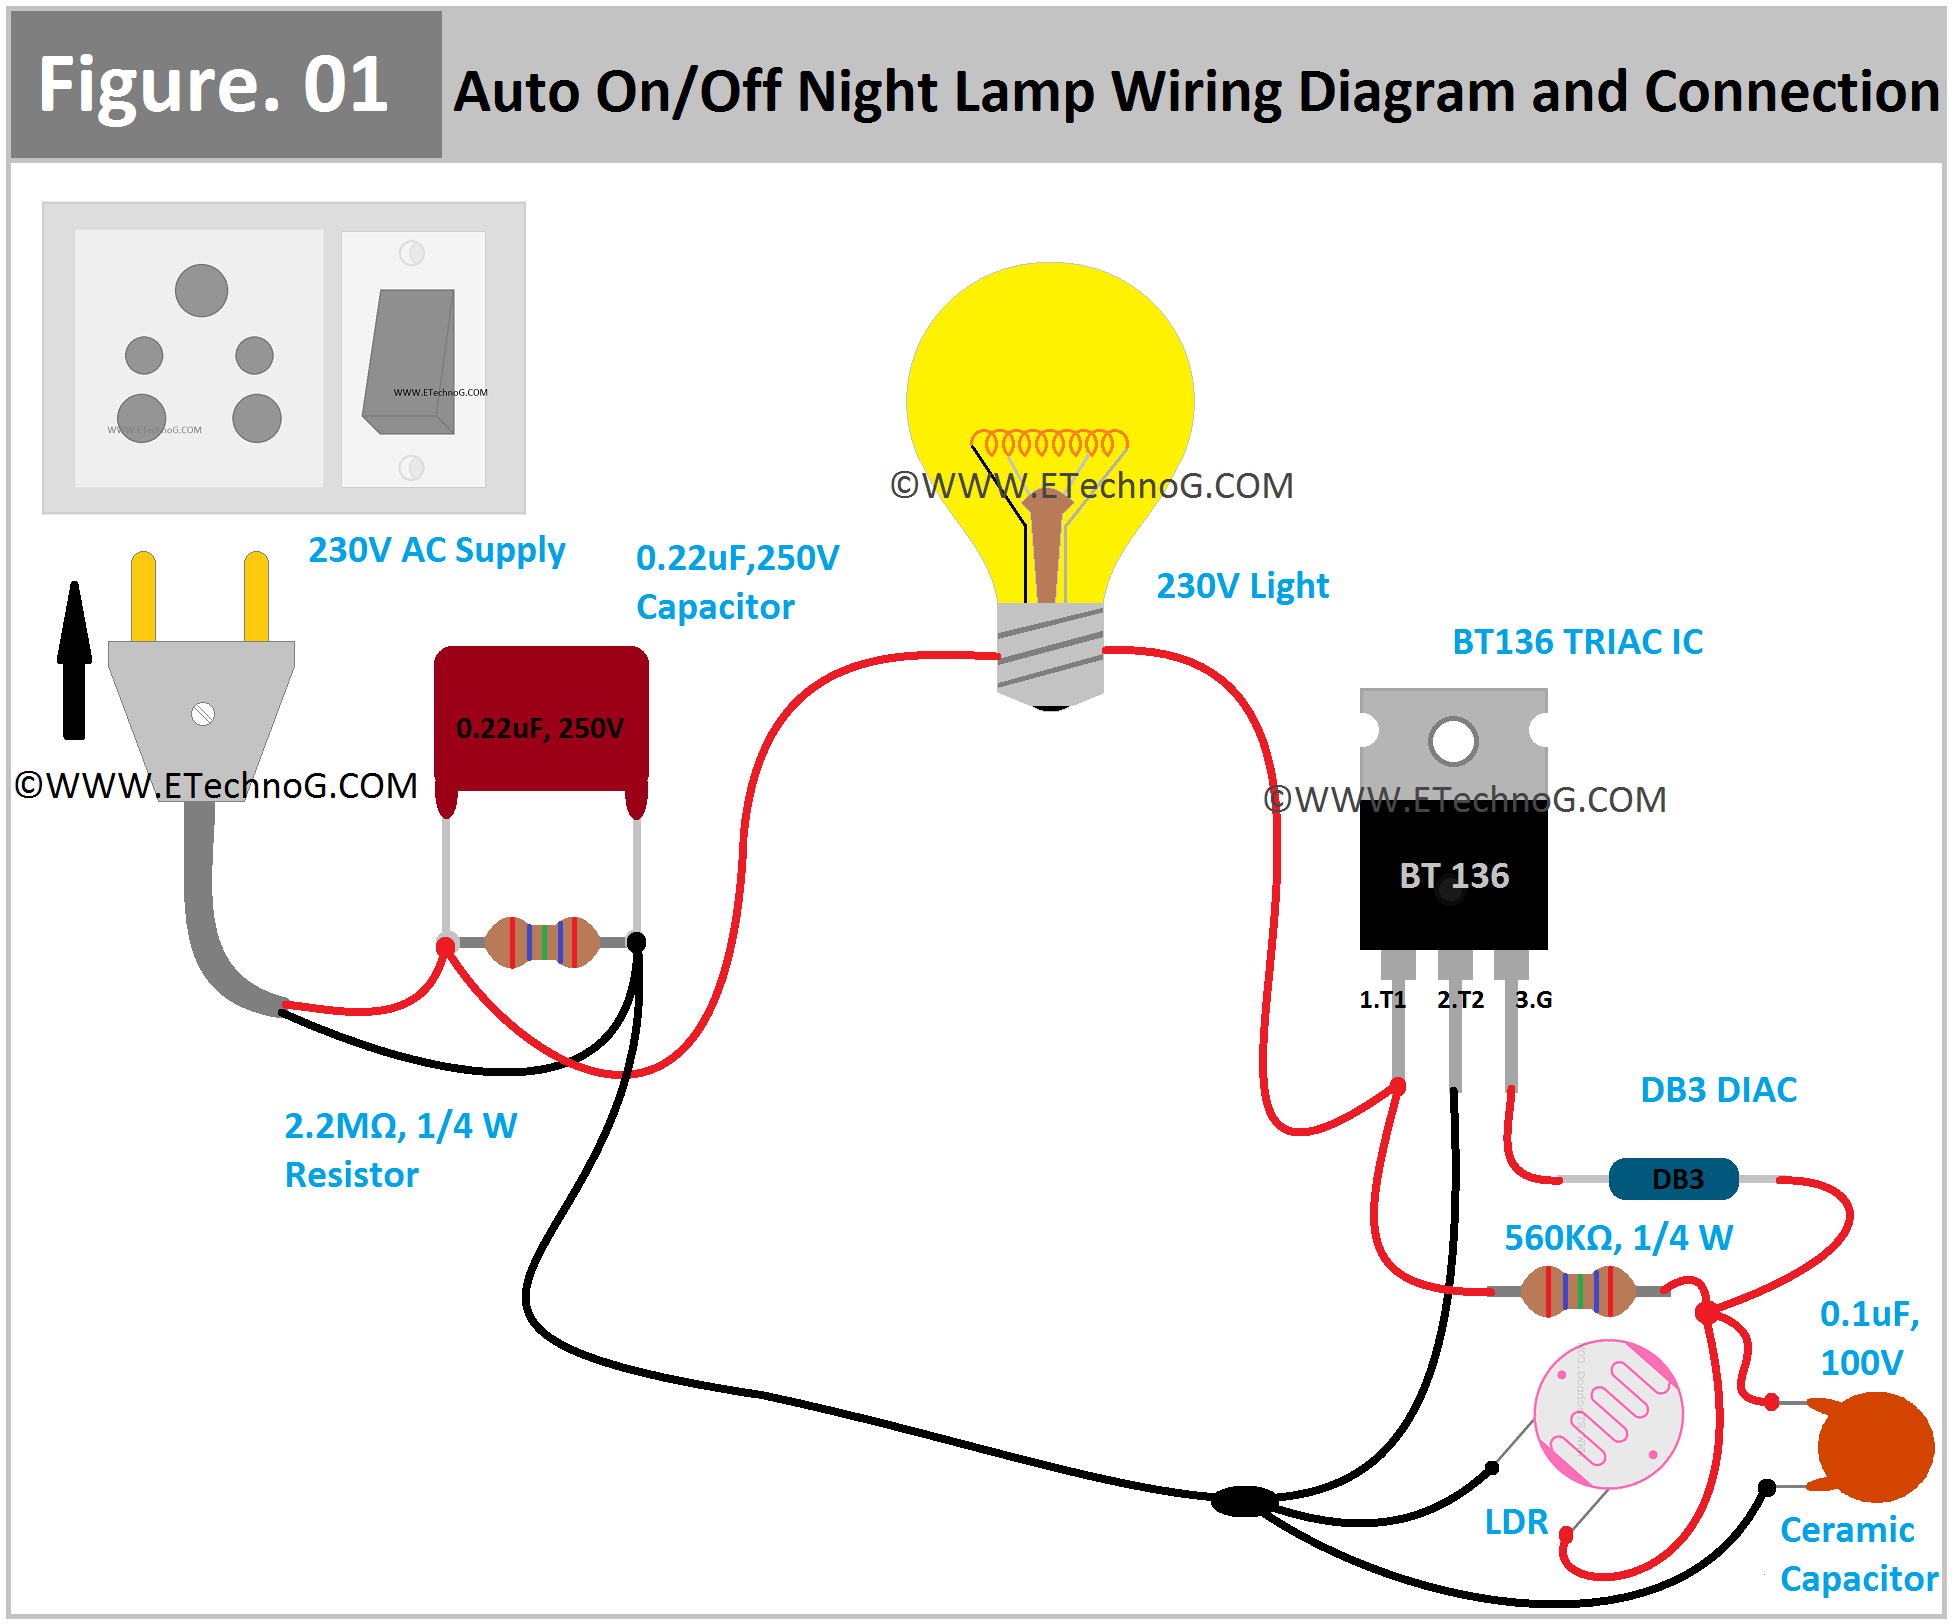
Auto On Off Night Lamp (230V) Wiring Diagram and Connection
Here, in this article, we are going to see the wiring diagram of an auto On Off light that will automatically turn on at night time(or when darkness occurs) and will automatically turn off in the daytime (or when already natural light is available). Also, we will know how to connect all the components. Here, we used a darkness sensor such as LDR(Light Dependent Resistor).
***Before going to learn about it please ensure that it is a high voltage(230V) circuit and there is no high voltage insulation. So build and operate it at your own risk. It is recommended to do not to touch anywhere on the circuit while the power supply is given. Apply power supply when the circuit is fully constructed***
Wiring Diagram or Circuit Connection
Here, you can see the wiring diagram of the auto on-off night lamp and the connection between each component.
List of Components Used
- 1 Pcs 0.22uF, 250V non polarized polyester capacitor
- 1 Pcs 0.1uF, 100V Ceramic Capacitor
- 1 Pcs 560 Kilo Ohm, 1/4 Watt Resistor
- 1 Pcs 2.2 Mega Ohm, 1/4 Watt Resistor
- 1 Pcs BT136 TRIAC IC
- 1 Pcs DB3 DIAC
- 1 Pcs LDR
- A 230V Light(CFL or any other lamp)
- A 230V AC Power Source
Connection Procedure
- Here, we have used a two-pin plug that will help to connect with the 230V power supply easily.
- The 0.22uF polyester capacitor should be connected in parallel with the input power source.
- The 2.2 Mega Ohm resistor also be connected in parallel with the input power source.
- Now connect the phase terminal of the power supply is to be directly connected to the phase terminal of the light or lamp.
- Connect another terminal of the lamp to the no 1 or no 2 terminal of the TRIAC IC BT136. Here we have connected to terminal 1.
- Connect another line terminal(here 2) of the TRIAC IC to the neutral terminal of the power source.
- Now Connect any one terminal of the DIAC DB3 to the gate terminal(3) of the TRIAC IC.
- Connect another terminal of the DIAC to any one terminal of the 0.1uF ceramic capacitor and connect another terminal of that capacitor to the neutral terminal of the power source.
- Connect one terminal of the 560-kilo-ohm resistor to the line terminal of the TRIAC IC that is already connected to the lamp(here terminal 1).
- Connect another terminal of that 560K resistor to the terminal of the DIAC that is already connected to the ceramic capacitor.
- Connect any one terminal of the LDR to the terminal of the DIAC that is already connected to the resistor and capacitor. And connect another terminal of the LDR to the neutral terminal of the power source.
Operation and Working Principle
As I told you before after full completion of the circuit building connects it with a power supply. And do not touch anywhere in the circuit when it is life. Place the LDR in such a place, and it will easily get natural light. Because, if any obstacle blocks the natural light on the LDR the lamp will be turned on even in the daytime. So place the LDR in such a place that will help the LDR to easily interact with natural light.
So when there is darkness or at night time the lamp will automatically turn on. And when in the day time natural light is available the lamp will be in the off condition.
When the LDR receives light it will conduct current hence the voltage across the gate terminal of the TRIAC is not sufficient to activate the TRIAC but when the LDR does not receive light during the night time it will stop conducting current so a sufficient voltage will arise across the gate terminal of the TRIAC, so TRIAC will be turned ON so the lamp will get the power supply and it will glow.
Read Also:

